Category Archives: Projects

Celebrating Holidays When You’re Wiped Out

easy holiday preparation

Spaghetti Wednesday  is our favorite holiday around here. Mark was finally walking without crutches. It’s the first year since 2014 that I wasn’t also taking care of my aunt so I was happy to host the dinner for the 21st year in a row.

It was a late night and then a low-key, us-only Thanksgiving but I was wiped out. No doubt, the four previous months of intense caregiving contributed to my fatigue but I honestly didn’t expect it.

The question is: how to prepare for Christmas? It’s easy for me during Advent to prepare spiritually. I have no trouble slowing down and putting off the rush and crush, but when everyone around you expects holiday activity, it’s a little overwhelming.

I stopped sending cards a few years ago. It was getting to be a chore that I no longer enjoyed. The kids got ornery about posing for photos. It’s difficult to genuinely send “best wishes, peace and joy” when you’re resentful (never of the people, just the activity). So I don’t. I still think about and pray for people. I give others credit for continuing to send us cards. I still enjoy seeing the photos every year.

I love christmas lights in the house but Mark always takes care of the lights outside. The sweetest neighbor offered to help with that but we declined the offer. Mark was able to do most of his usual light hanging. My brother went up the ladder to hang the big wreath on the side of the house.

To be honest, Mark welcomed the non-strenuous activity, the weather was pretty mild and he finished everything outside in a couple of hours over two days.

Inside, I’ve just been taking my time and getting one project/area out at a time. I have the time and have enjoyed doing it at a leisurely pace. Little Mark is elf-like. I have referred to him as joy boy, which is still true. He’s always up for holly and jolly. I find myself waiting until he’s home for certain tasks just because they’re more fun with his help.

So, my advice for facing the holidays when you’re tired or overwhelmed is to abbreviate and get out one thing at a time. You’ll probably realize that a little bit of glow is enough.

DIY Slipcover Repair + Joy for teens!

I realized after last week’s major slipcover catastrophe that I never posted photos of the finished slipcovers. Without further adieu……………………

TA DA!

DIY slipcover "after"


Here’s another view of both pieces of the couch….

DIY slipcover "after"

I was able to make a few minor repairs and the covers look pretty much the way they did before the washing machine chewed them up. There are some spots by the zippers that could use some attention, but since they aren’t visible, I’m not worrying about it now.

I actually shot video of almost the entire process of making the slipcover. I still intend to publish the video in a series of steps but boy is it time-intensive to edit and upload. Mark was my cameraman and makes a few cameos. He’s far more natural in front of the camera and I actually considered using him as a stand in for the entire series.

So, you’re probably wondering how the white’s working out? To be honest, the main part of the cover could use a bath but I’m a little hesitant to throw it in the machine. I will try gentle. I might try to secure the edges before I toss it in. No matter what, I’ll use less bleach on the gentle cycle. I’ll report back on that.

In case you were wondering, the couch is in our recently remodeled basement room. That remodel was the first step in my plan to repurpose my house to accommodate our growing (in size not number) family.

The plan is just one element of my intention to “MOVE” in 2014 and so far, things are progressing.

A joy plan for teens

I wrote last week about “40 Days to a Joy-Filled Life” by Tommy Newberry. I ordered the teen version for one of my children and we sat down last night to begin the study. I can tell that it’s going to be a productive read for both of us. As impressed as I’ve been by the action plan for adults, I’m just as convinced that the plan for teens will be just as effective.

The first day’s lesson talked a little about the power to choose thoughts and their effect. The drill suggests identifying thoughts which are opposite of  the person you expect to be and the person God intends for you to become. Then, Newberry suggests preparing a joy-producing thought to replace it and sharing it with someone. We decided that we would text each other our joy-producing thoughts. It’s just a proactive plan to push negative thoughts out of the thought loop.

Our plan is to go through the book during lent but I’ll be recycling these exercises forever.

Linking up to Elizabeth Foss‘ blog:

needle and thREAD

Disclosure: This post contains affiliate links. If you purchase something through the link, I’ll get a small commission at no extra cost to you. Thank you so much. Even if you don’t use these links…..these books are GREAT!

How NOT to wash a slipcover

How NOT to Wash a Slipcover! (And a book recommendation for lent)

How NOT to wash a slipcover

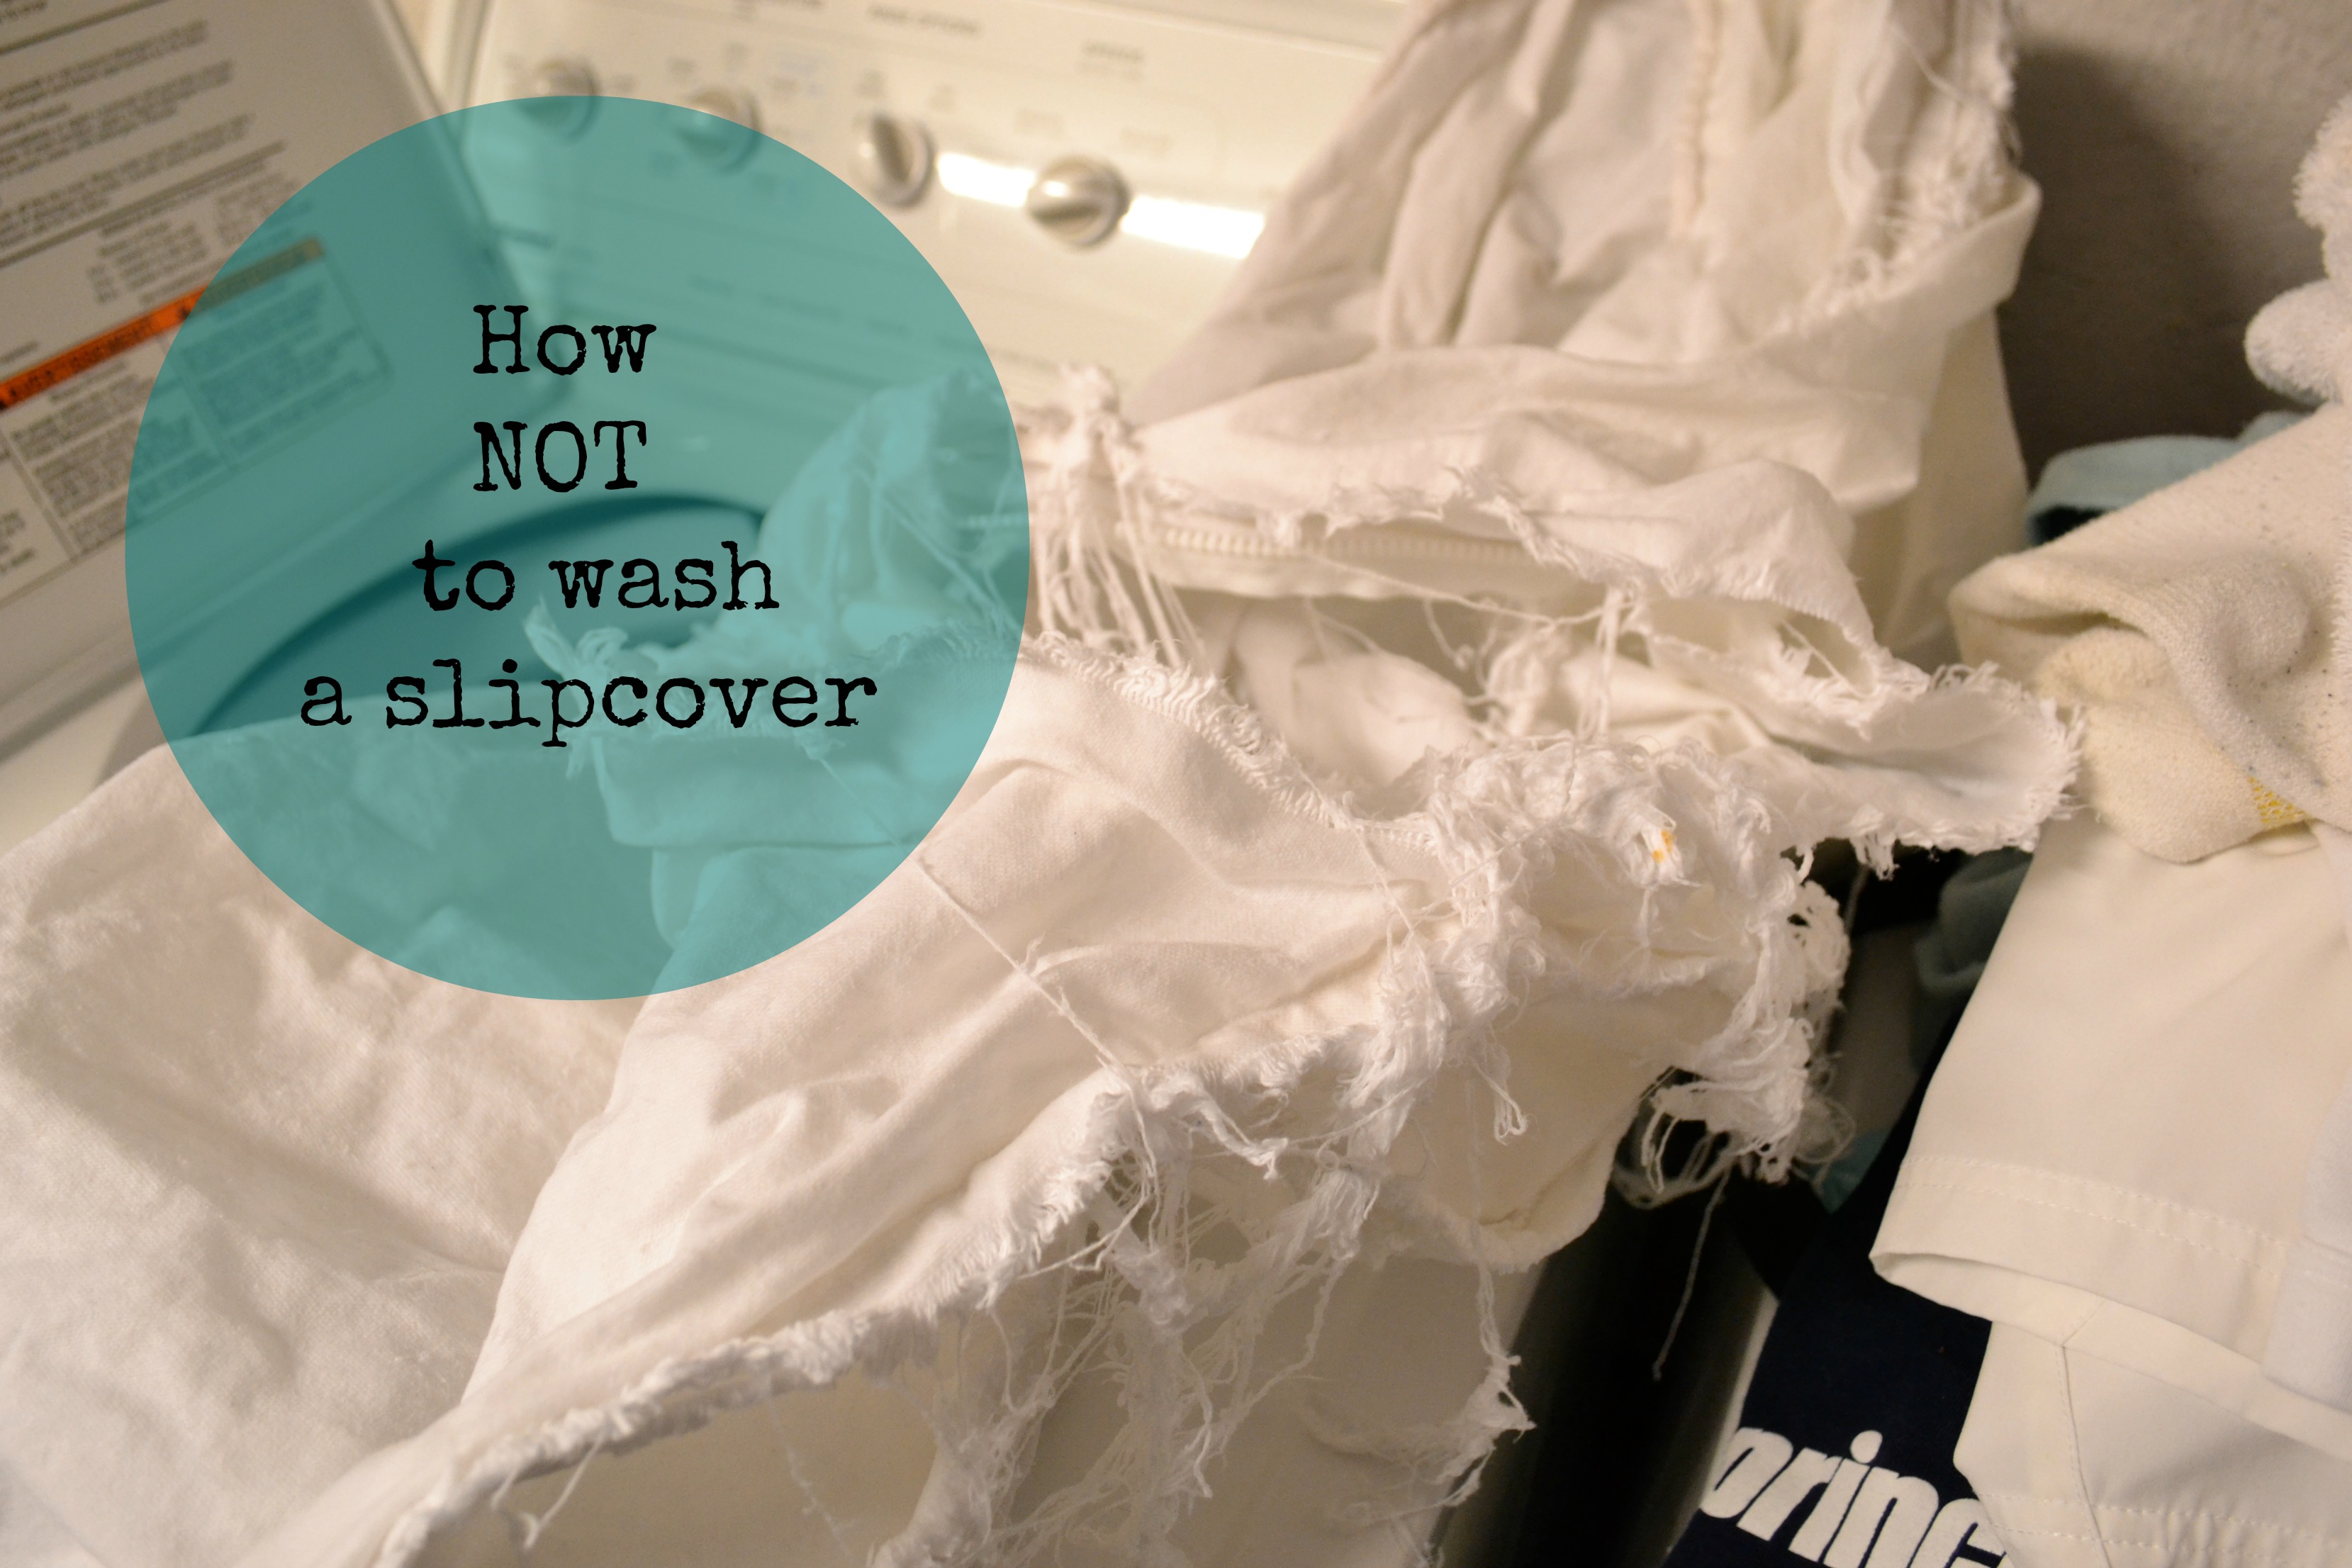
This is what happens when you throw your DIY slipcover into the washing machine


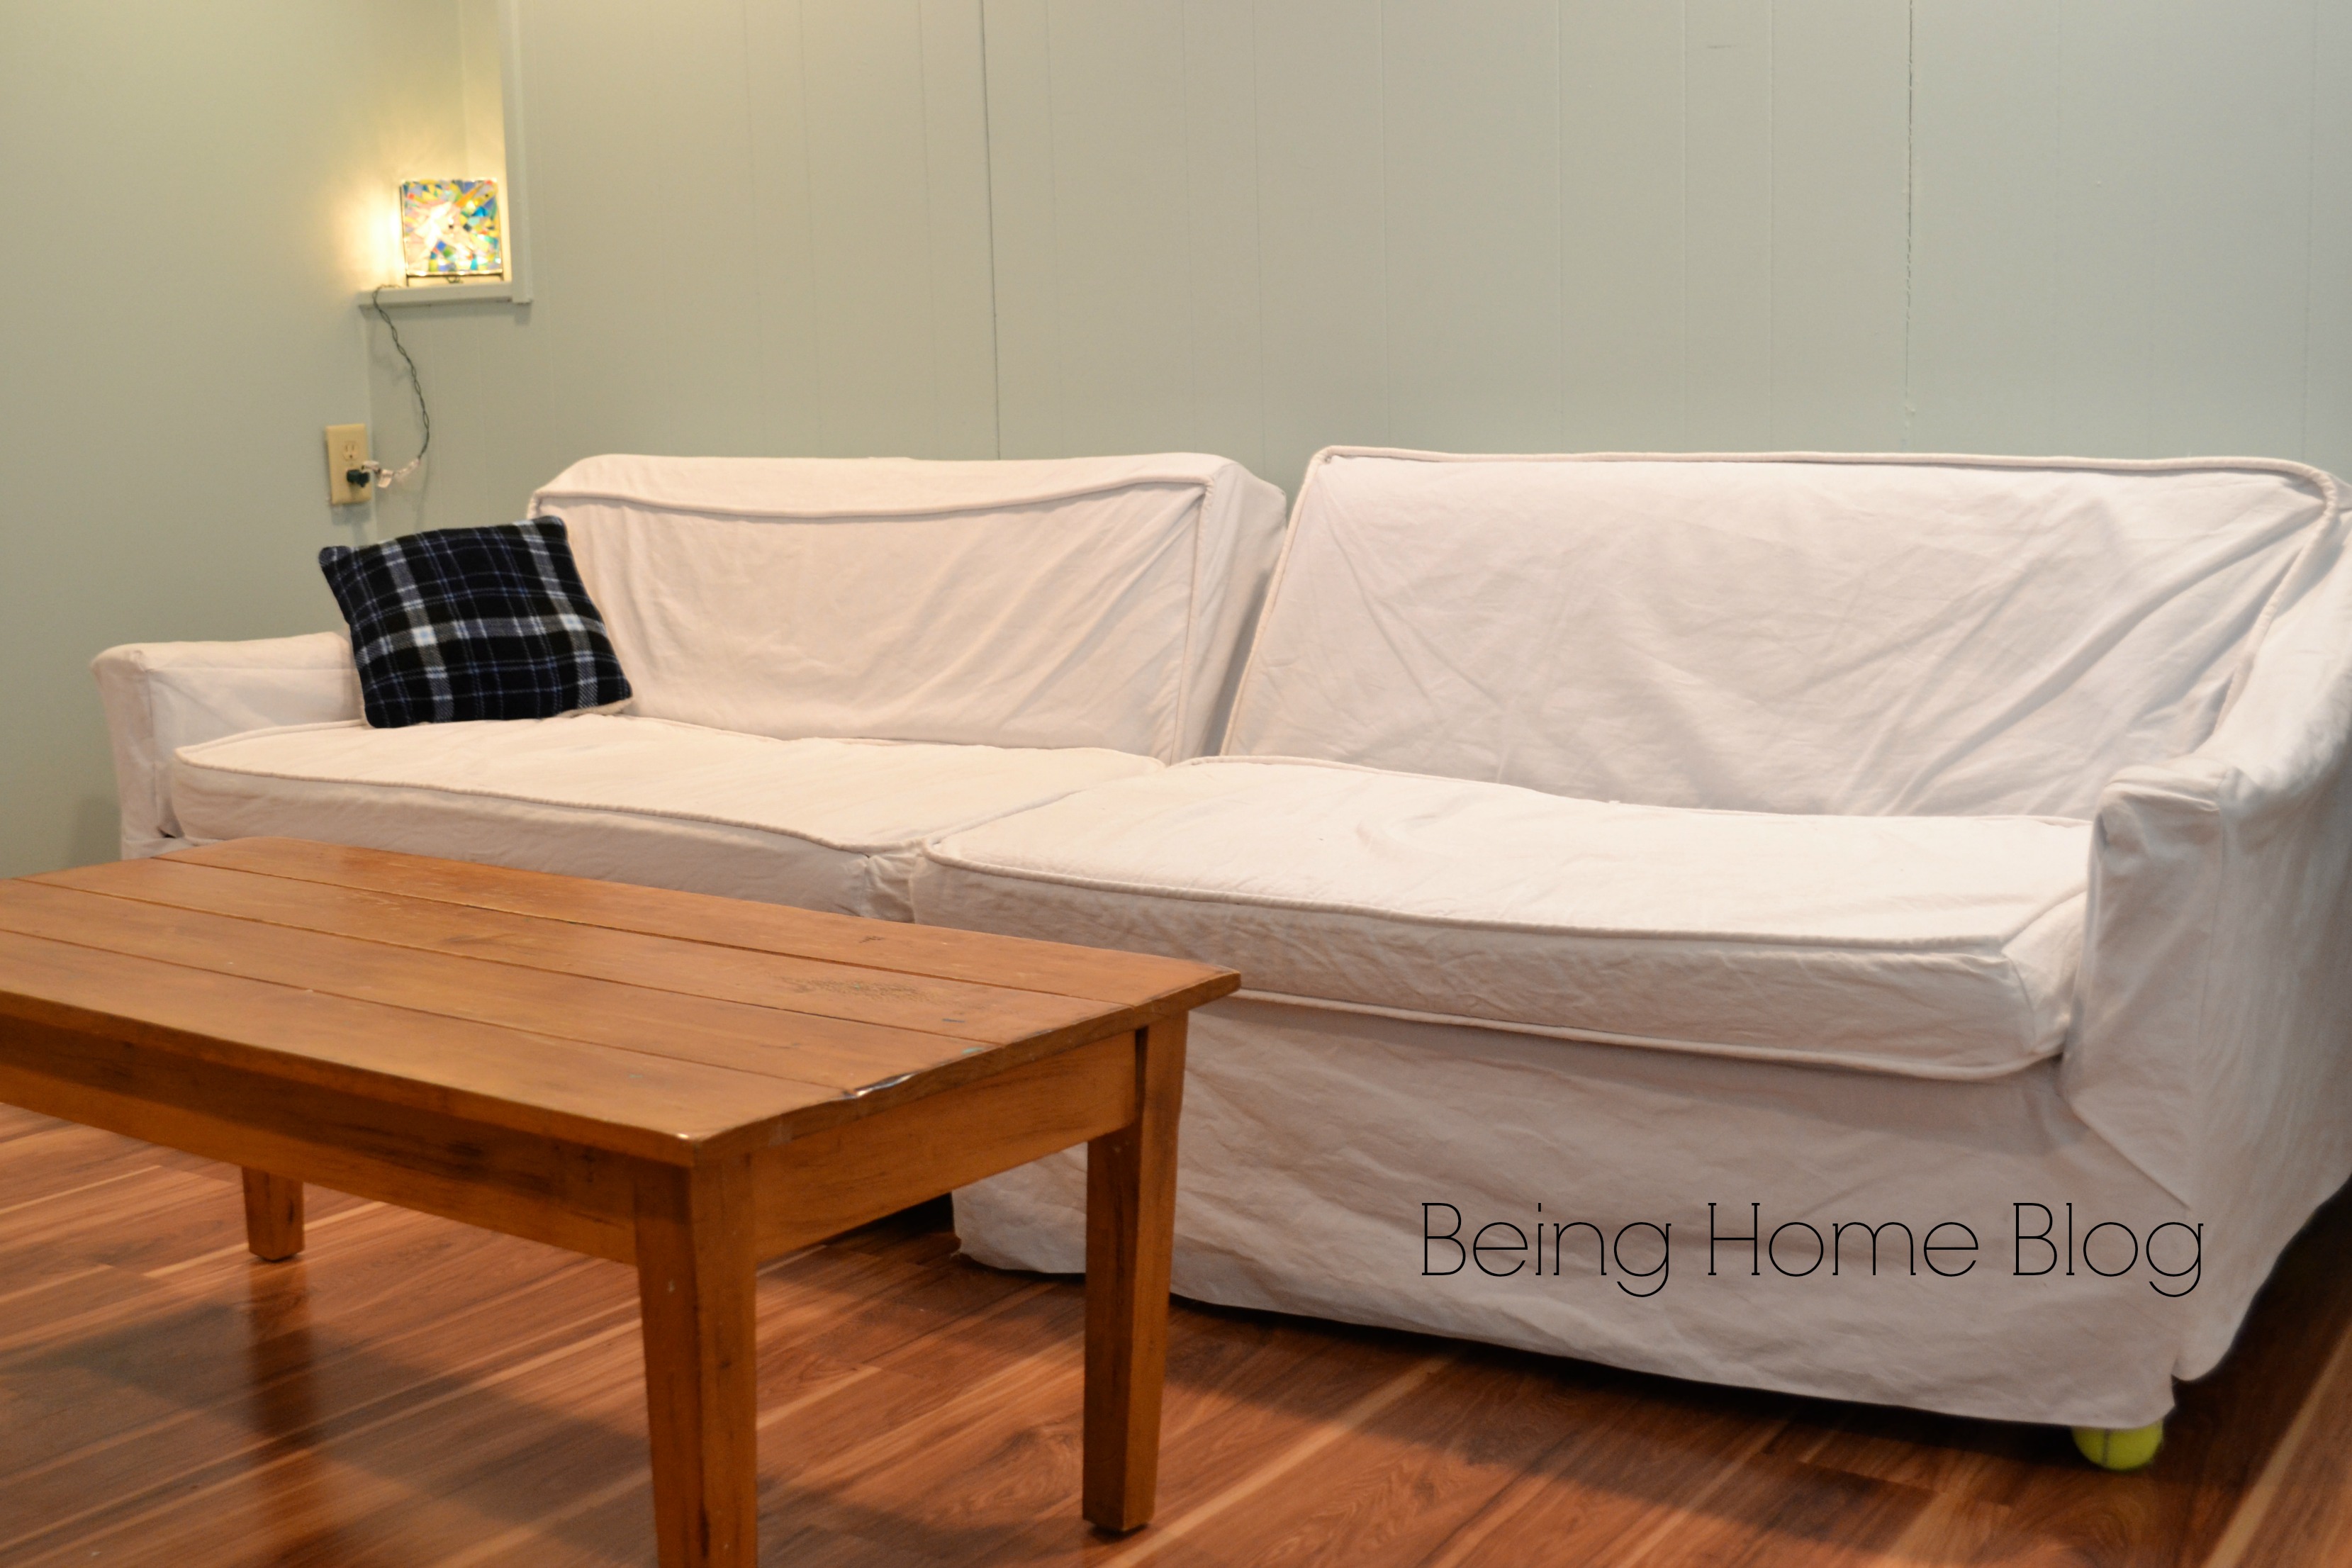
Shame on me for NOT getting around to taking a photo of the slipcovers I made by myself. I will post a photo after I repair them. I still hope to publish a slipcover tutorial because I learned by reading and watching other tutorials on the internet and I want to encourage you to do it, too.

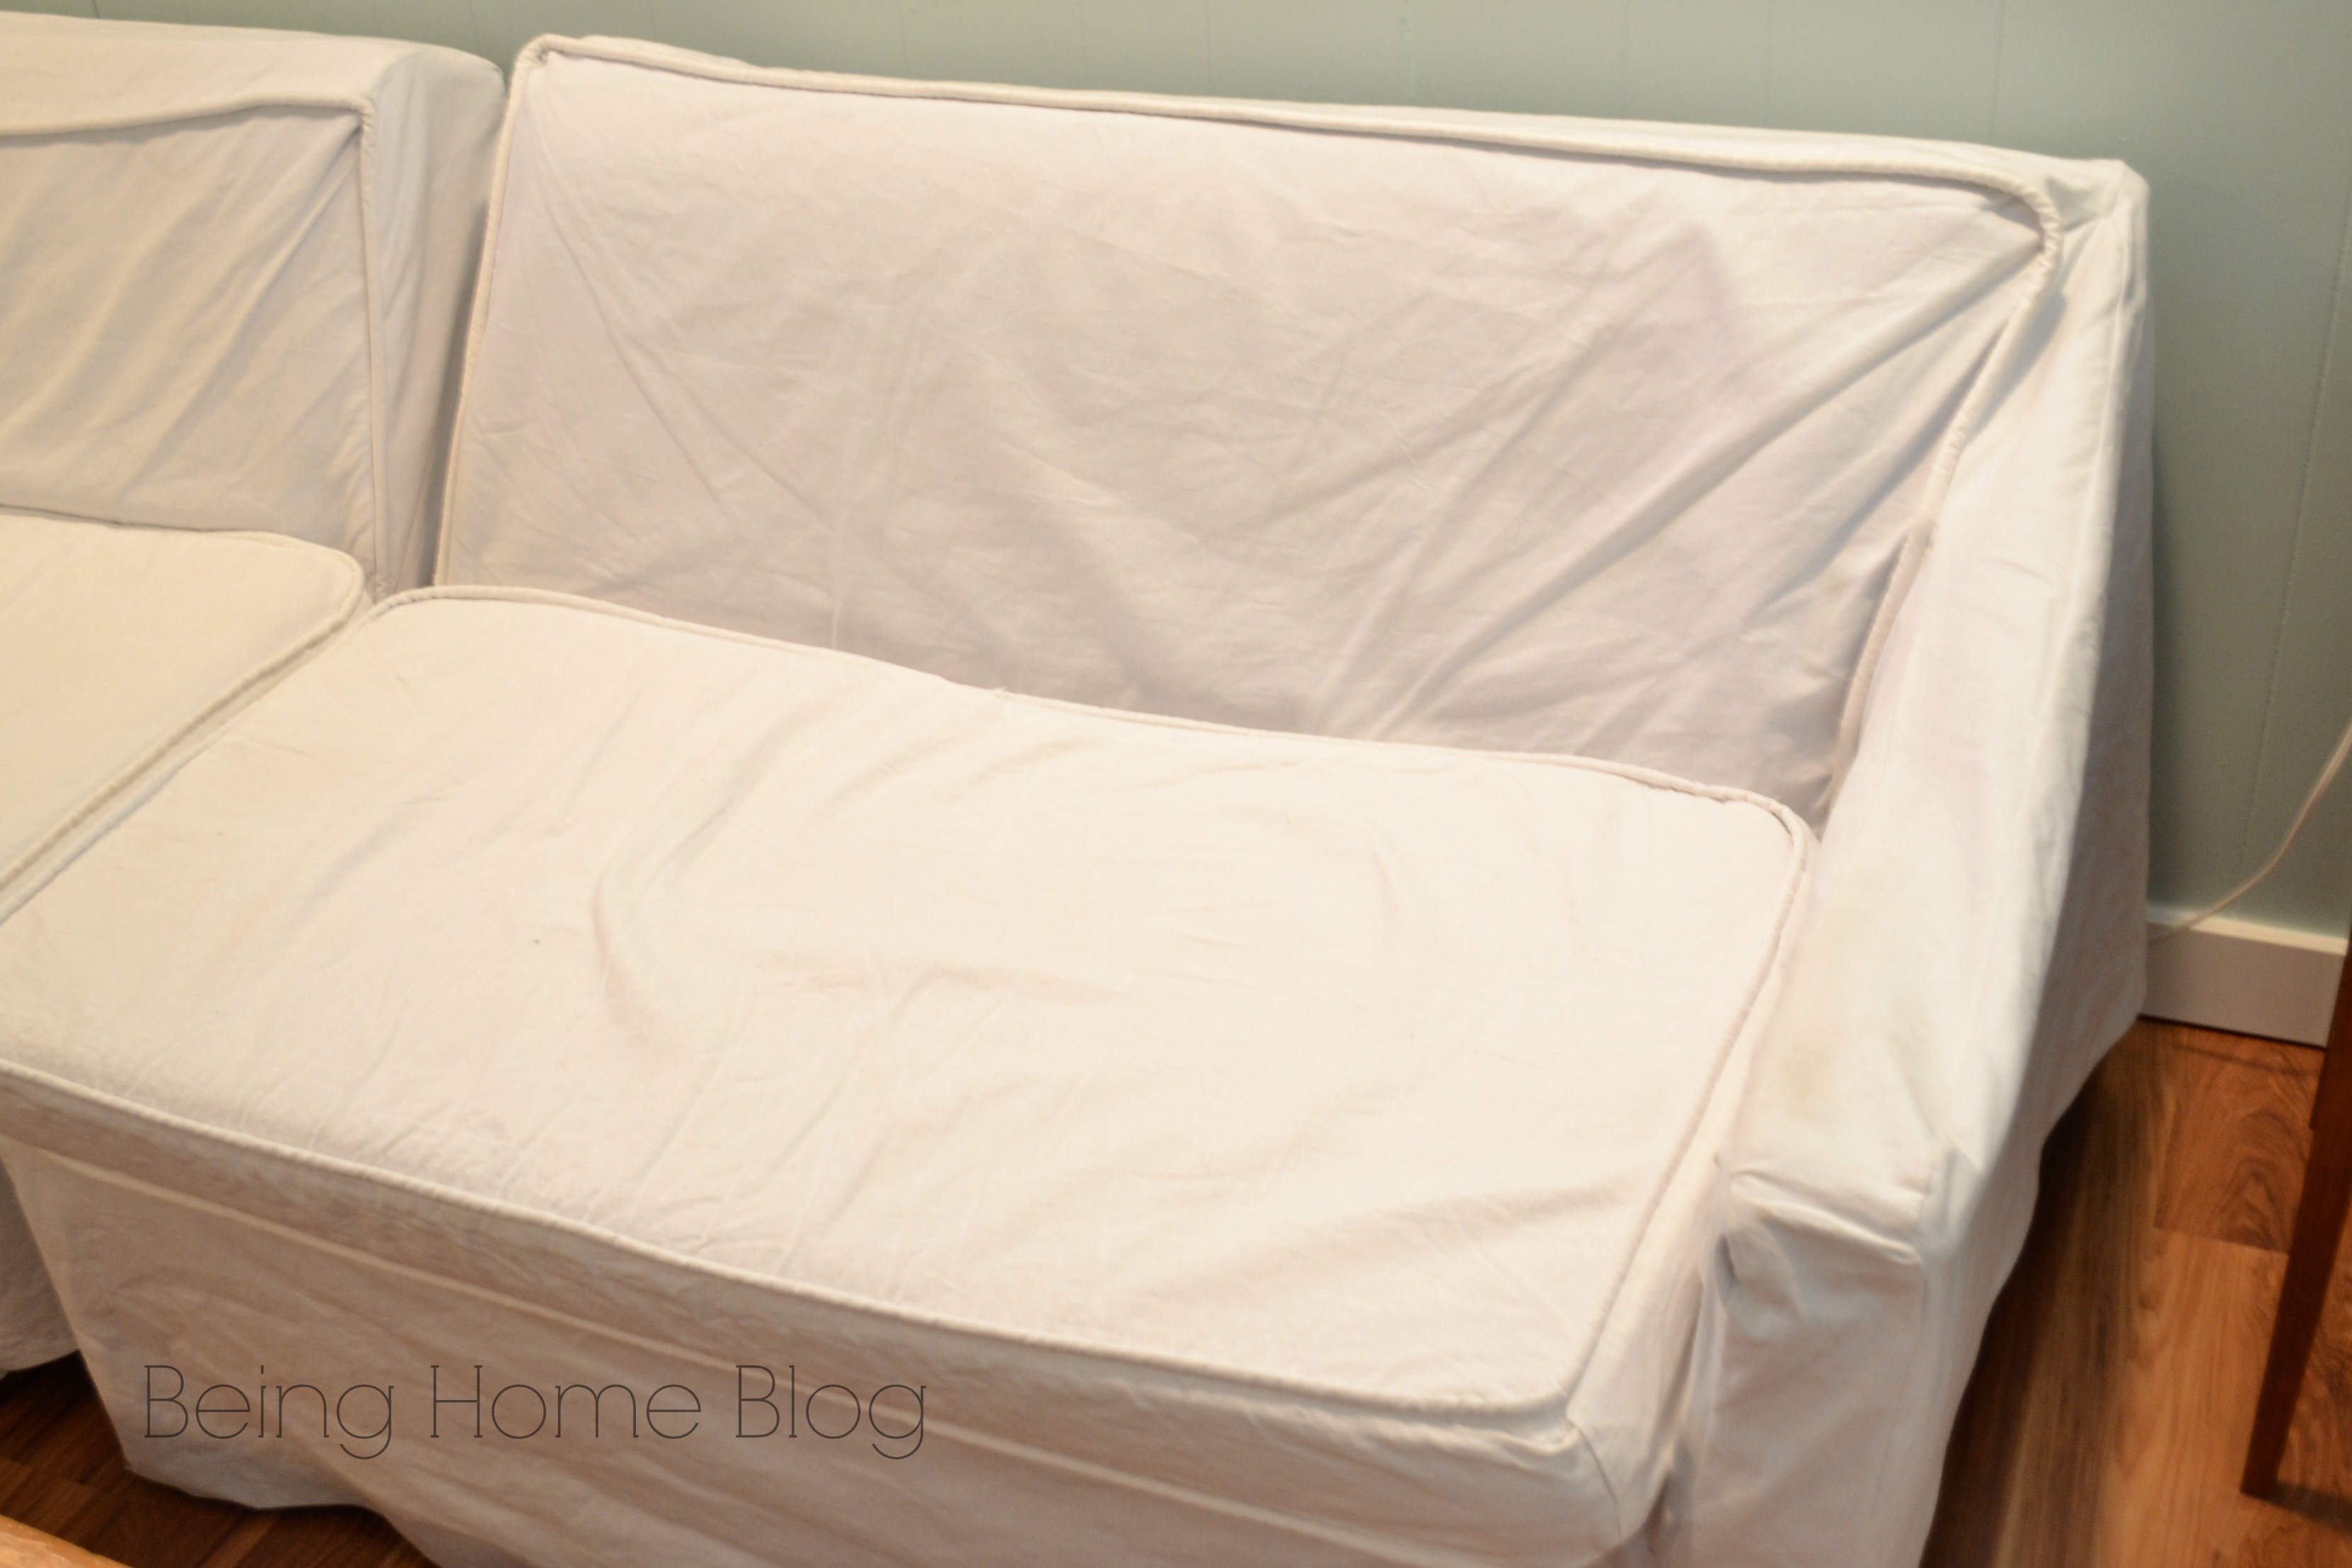
One reason I chose white instead of gray was so that I could wash them with bleach if necessary. I was surprised that they were beginning to get very dingy (in spite of the winter season and the kids not playing outside much). Maybe it’s a clue as to how dirty our house is….blech!

I put the cushion covers into the washing machine on the soak setting. This machine is new to me (but used) because our fancy, schmancy Fisher and Paykel washing machine needed yet another motherboard and I wasn’t having any parts of that. I wasn’t aware that the soak cycle was manual and maybe it’s not supposed to be. Like I said, this machine is used.

The slipcover was soaking in bleach water over night. That ain’t good. I ran it through the spin cycle to drain the water. They were in pretty decent condition after that and I decided to just run them through a normal cycle. As you can see by the mangled, frayed, hot mess above, I should have taken a few precautions.

If you took the time to make your own slipcovers, you might want to follow these steps in order to minimize damage during the laundering process

#1 Zip your slipcovers closed

I’m pretty sure this one simple step would have minimized the fraying and protected the zippers. Instead, nearly every edge frayed into a tangled pile of string. The underside of one cushion completely came apart in the middle. Boo.

#2 If you’re planning to use bleach, minimize the soak time

Bleach is pretty potent stuff. It can be brutal on fabric, thread and seams. Have you ever accidentally spilled it on something? I have and it burns holes through fabric.

I know, I should have used a chemical-free, natural whitener. Honestly, I haven’t found any that work as well as diluted bleach. I know I’m weird, but the smell also makes me think it’s really clean.

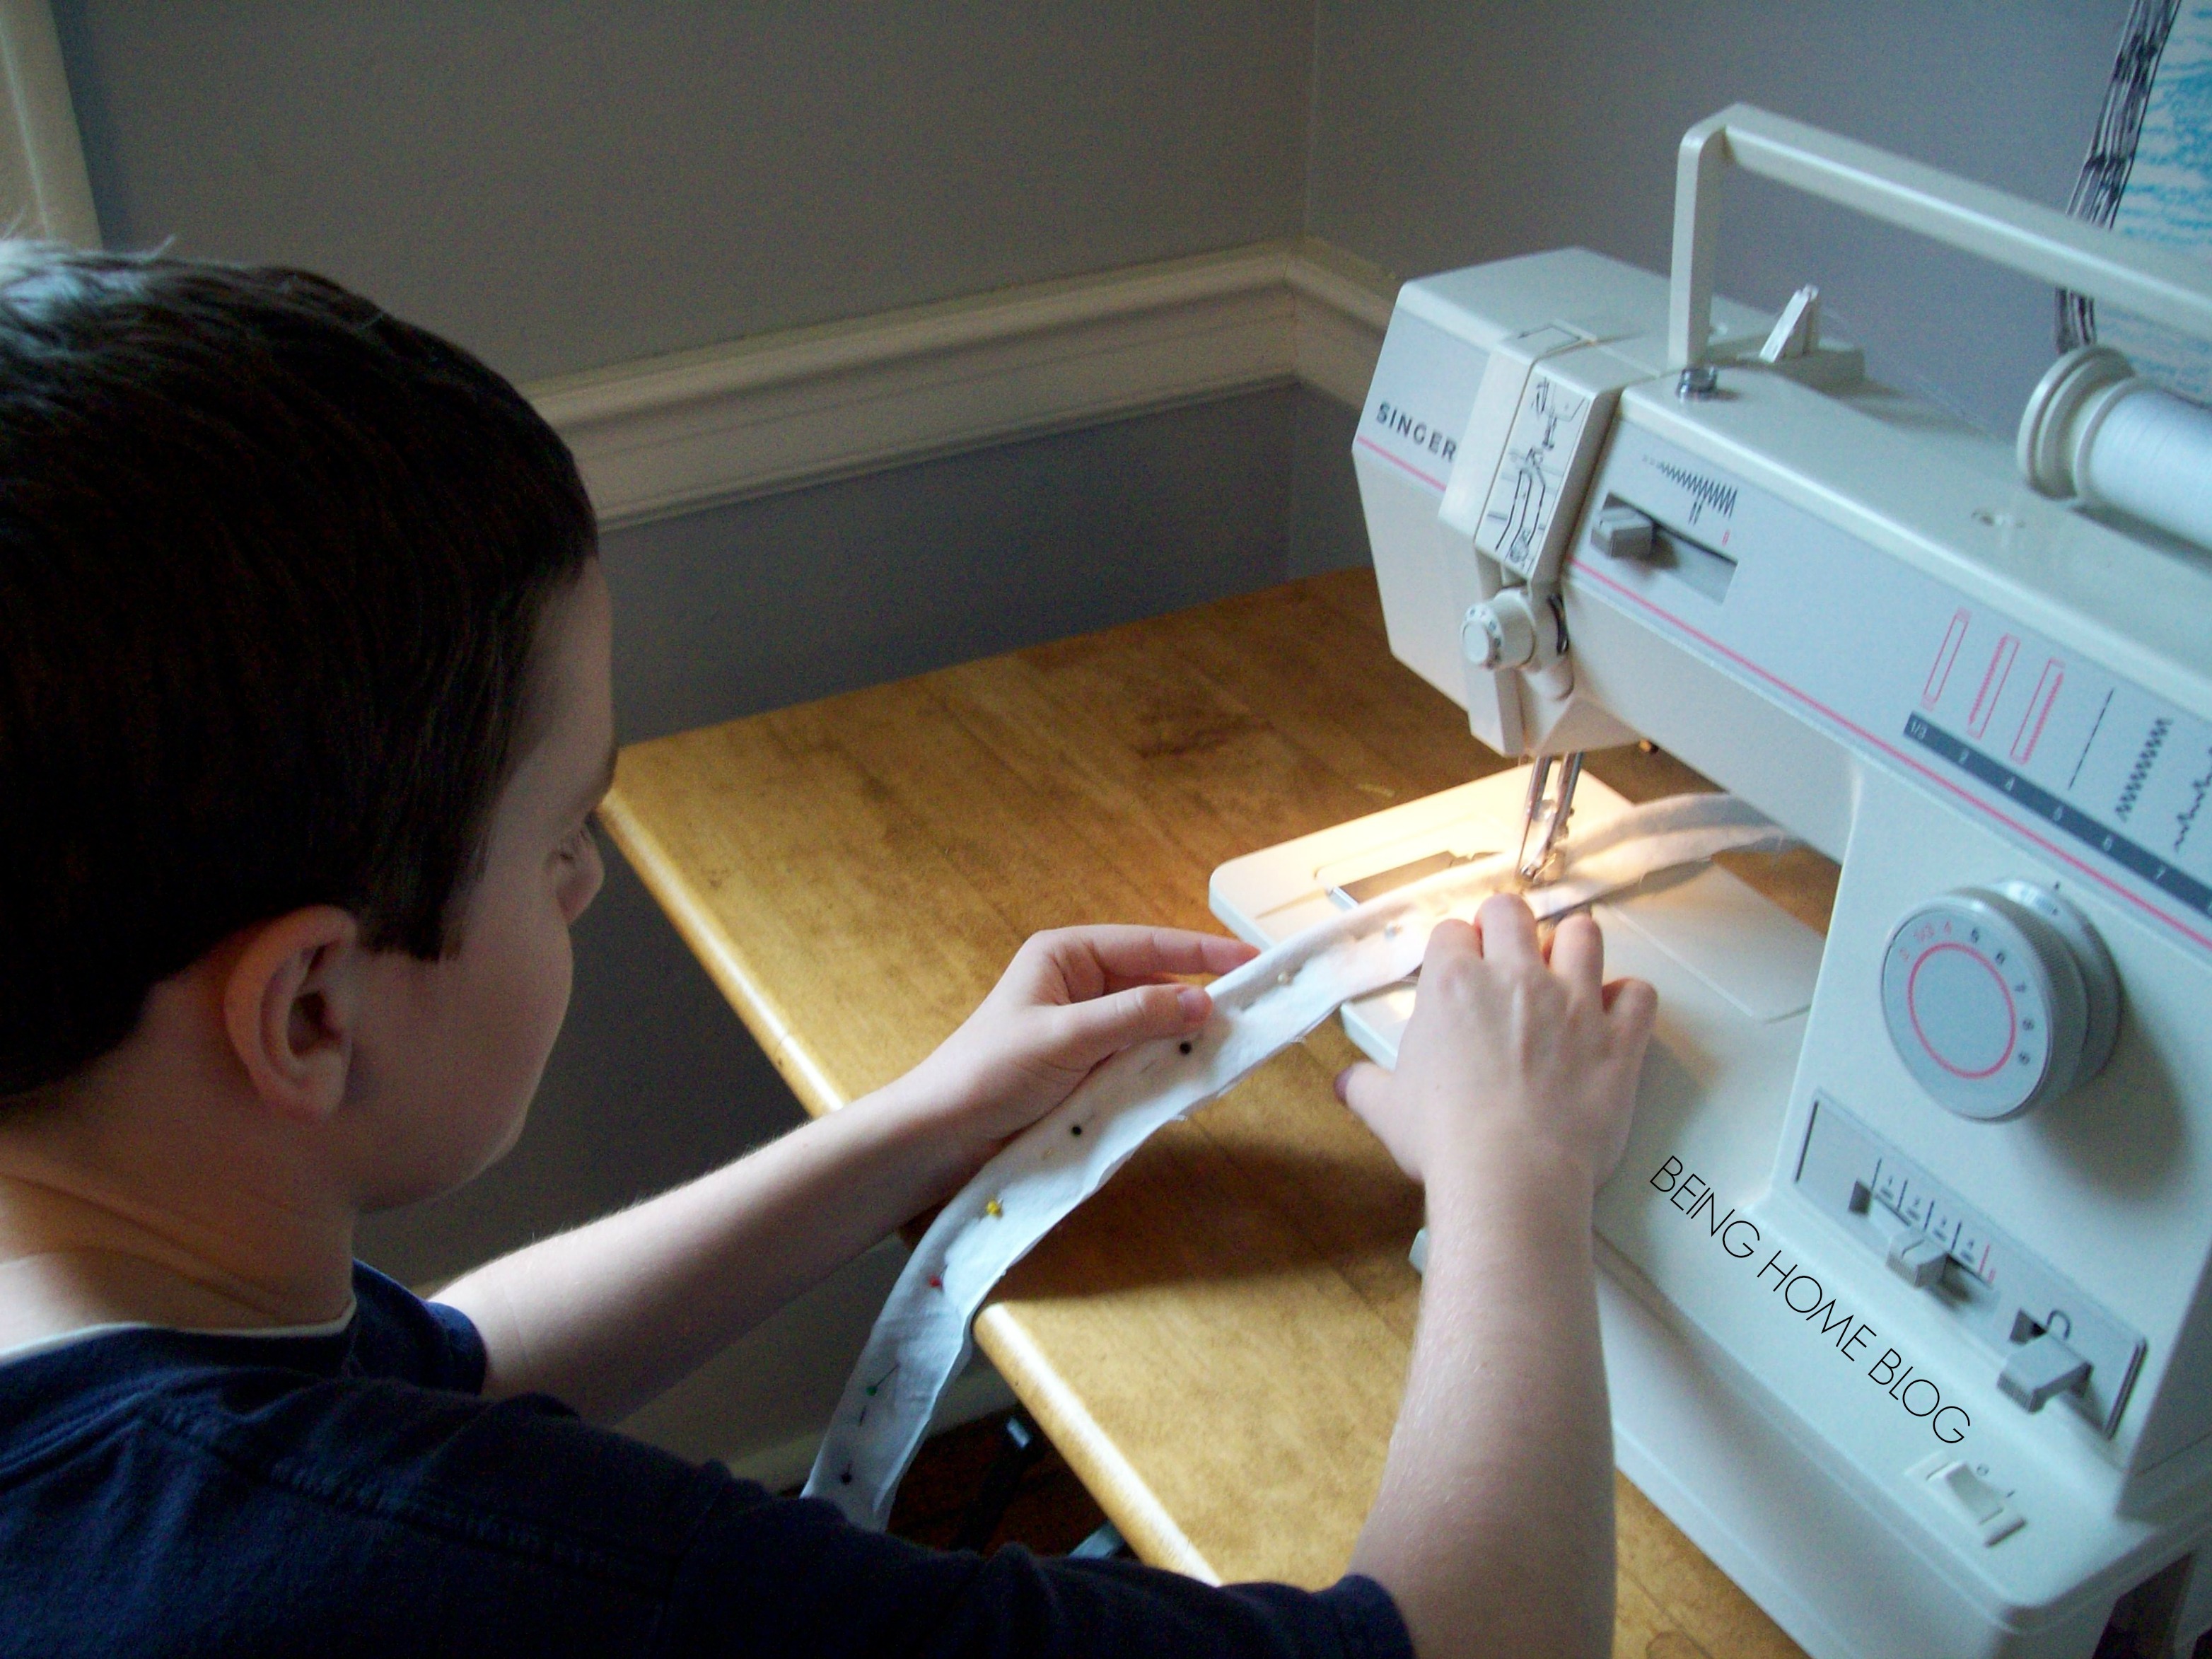
#3 When you’re making your slipcovers, serge or bind the edges if possible.

I don’t have a serger (they kind of scare me) but I know you can protect edges manually by using a zig-zag stitch. This would have minimized the fraying and the piles of thread and fabric I ended up cutting off the covers.

#4 Use the gentle cycle

Again, I’m not sure this would have prevented fraying and tearing altogether but I think it would have helped. Had I zipped the covers first and washed them on the gentle cycle, I don’t think I would be forced to repair the covers.

So, I learned my lesson. Of all the slipcover tutorials and tips I’ve read, none has ever warned about the dark side of laundering them. I did read one post about PREWASHING the fabric to prevent shrinkage after the slipcover is made. I hope these tips will help you avoid the same mistakes I made and preserve your handmade slipcovers.

Although I wasn’t planning to sew this week, I’ll be getting the machine out to try to salvage the cushion covers until I can spend more time replacing some of the parts that lost too much.

Now for the book recommendation….

40 Days to a Joy-Filled Life

If you’re looking for a lenten devotional, this book might be perfect

I’m currently reading a great actionable study of Philippian’s 4:8. “40 Days To a Joy-Filled Life” by Tommy Newberry is kind of the workbook to his first book called “The 4:8 Principle“. The first book explains and makes the case for taking Paul’s advice to set your mind on what is true, noble, praiseworthy and excellent. The companion book breaks it down and suggests daily “drills” to help you practice joy-producing thoughts.

I’m about half way through the book and it has helped me maintain peace and even joy in spite of some challenging circumstances. It’s definitely a book that I’ll refer to repeatedly but it’s been great to help me identify joy-reducing thoughts and practices during my days and replace them with joy-producing thoughts.

Newberry has worked as a life coach for years and has such a clear way of explaining and supporting his ideas scripturally, spiritually, practically and physiologically. Not only does he effectively convince the reader that joy is a choice regardless of your circumstances or environment, but he gives you a plan to experience joy as a habit by controlling your thought patterns.

I highly recommend both books and even got the teen version, “Think 4:8“, for one of my daughters. We plan to make our way through it together during lent.

On that note, I think these books are excellent devotionals for lent. You can start “40 Days” without having read the first book, but if you’re not convinced that joy is a choice, you might want to take the time to read “The 4:8 Principle” first.

Linking up to Elizabeth Foss’ blog. If you’re looking for inspiration for sewing or something to read, head on over there.
needle and thREAD

Also linking up here:

The Shabby Nest

Go BE INSPIRED!


Disclosure: This post contains affiliate links. If you click on a link and make a purchase, I’ll receive a small commission at no additional cost to you.


Laws of Motion

My “Word” for 2014

Laws of Motion

In the past few years I’ve chosen “simplify” and “fearless” and those words were perfect at the time. I don’t think I chose a word for 2013 but I seemed to accomplish a lot so I’m fine with that.

It always takes me a while to decide and I never put the pressure on myself to choose something by January 1. I’ll continue to simplify and confront my fears. My new word feels right and appropriate for all the areas of my life and I can’t explain how it sort of just popped up, but it did.

“MOVE”. That’s my word. For my 2 friends who might still read this blog, I’m not referring to my household. I’m staying put in my 1800 sq. ft farmhouse. I love it here. But in nearly every other category of life, I need momentum.

Mark and I celebrated our 20th anniversary in 2013. That’s all good and I’m grateful to be with him but in some ways, I feel like we’ve let life happen to us.

When you’ve spent 18 years in a house and it doesn’t feel that much different than when you moved in, it can be a little discouraging. I’m determined to “move” on some big house projects so it functions better for our family. With the help of a local contractor, all of us are moving within the house. That plan to make our house more livable and functional for us includes creating a 4th bedroom for our family of 6 without an addition. We’ll be moving people and stuff from room to room. That will undoubtedly be the biggest change but at the end of it the girls will each have their own bedroom and the boys will have a bigger room. The boys don’t mind the room they’re in but it drives me crazy. Their current room will accommodate one person (Kate) much better. Hopefully, the new family room will comfortably seat more than 3 people.

I think it was last year at about this time when I had plans to finish painting the trim in my bedroom (and the rest of the house). Yeah, that still isn’t finished. I’ll be moving on that project. I think I’ve had blue tape on my bedroom wall for an entire year (unless it’s been two-yikes).

I literally haven’t committed to exercising since Hannah was born….16 years ago! I intend to do something to move and sweat on a regular basis. No excuses. If I need shoulder surgery as a result (one of my excuses), I’ll deal with that.

I’ve committed to writing 500 words a day in order to get moving on writing again. Last summer, I accomplished a goal of writing an ebook. I was able to write nearly every morning before the house woke up. I published the book on Amazon on August 29 and two things combined to sabotage my writing for a while. First, I was so sick of words I couldn’t think straight. Second, school started and Mark was up early for a class 5 days a week. I discovered that I have a hard time writing with distractions. It’s also hard for me to write at night.

I’m sure there are other areas which will benefit from some movement as well. I need to move money and move clutter out of the house and garage (that’s a given). I’ll keep you posted.

What are you doing for the new year for a fresh start? Choosing a word? Setting goals? Making resolutions? Starting a new habit? (Speaking of my new habit…I forgot to discuss this with Mark but I’ve been writing down my expenditures. I’m even including mileage to and from tennis -40 miles round trip-so we and Luke have a better idea of the cost). Sorry for the digression…I’d love to hear what you’re doing.

If you want to join the 31 day 500 word a day challenge, head on over to Goinswriter.com to get the details.

DIY Slipcover Sneak Peak

Nothing like a room makeover to get you motivated to do something you’ve been meaning to get around to for 2 years! I posted photos of my heinous basement  a couple of years ago (scroll down to the “TV” room with the couch. See that brown couch?….here’s another photo of half of it:

DIY slipcover before photo

Kind of “Madmenly” Don’t You Think?


I actually think the shape of this couch is pretty cool, even the brown chenille upholstery but it’s just a little too tired and I’m not cool enough to pull it off “as is”.

I picked it up at a consignment store a few years ago for $50 after the whiff test and the sit test. Our basement has narrow openings and I thought this would work since it came in 2 pieces and it’s mid-century self is small. I don’t know why the furniture was so short/small just a generation ago but it was. Both pieces are still sturdy and obviously came right out of an estate where they were likely covered in vinyl slipcovers for the previous 40 years…works for me.

I wasn’t sure whether I would eventually reupholster or slipcover it. I decided I didn’t want to tear into it and I love the relaxed look of a custom slipcover so I decided to try my first one.

After 18 years of intending to do something in the semi-finished basement room, we finally decided to have it done. I wish we could DIY but neither of us has the time or expertise to tackle it. The contractor who remodeled the kitchen over at the duplex is fixing it up for us. (I really promise to do a post about that project).

Now was the time to start those slipcovers (remember, this couch has 2 halves).

I’m going for a relaxed but fitted cover around the body and I’ll recover the foam cushion separately. I have some experience with those as you can see here and here, so it shouldn’t take too long.

Here’s a photo of my progress…

DIY Custom Slipcover

About half way through the first piece.


I’m only putting piping on the top of the slipcover part and around the edges of the cushions. It adds a more finished look and isn’t too hard to insert on these straight lines.

I plan to post a tutorial. Basically, I’m pinning 2 seams together inside-out, sewing, pinning another 2 seams together, sewing and just putting the puzzle together and figuring it out as I go along. So far, this method is working well. Mark’s helping a little with ironing and sewing and is more excited than anyone for the changes.

Mark sewing piping

Sew Easy an 11 year old can do it.

I’ll post a more detailed tutorial (and maybe a video) when I put the cover for the other part of the couch together. I need to see how this one goes together first and the second one should go even smoother.

Since I’m linking up over at Elizabeth Foss’ series “Needle and thREAD”, I’ll mention that I’m rereading a book that doesn’t necessarily advocate homeschooling but it might be the single most influential book in convincing me that homeschooling was a great option.

In a “A Mind At a Time“, Dr. Mel Levine describes and demonstrates how people are wired differently so that they learn and process information differently. He’s so thoughtful and articulate and just makes a great case for accommodating strengths and strengthening weaknesses. He has clinical experience as a pediatrician, taught pediatric medicine at the University of North Carolina and has studied learning and development throughout his career.

I’m always fascinated by how the mind works and this book gives great anecdotal examples. When I first read it, I wasn’t even considering homeschooling but appreciated it as a great parenting resource to understand the differences among my children and to understand my own strengths and weaknesses. Because he writes about real patients in his practice, the book isn’t dry at all. Much of it reads like a series of stories to demonstrate his ideas and conclusions.

Go check out Elizabeth’s post and the comments to see what others are sewing and reading by clicking on the button below.

needle and thREAD


Disclosure: This post contains an affiliate link. If you purchase a product through the link, I’ll receive a small commission at no additional cost to you. Thanks!

DIY Kitchenaid First Aid

I’m usually relatively observant but it turns out that my stand mixer has been playing injured for at least a couple of years. Not days or weeks……..YEARS! My red mixer should have been red-shirted a long time ago. But it’s the little mixer that could, I tell ya!

The head has been wobbling, like I said…and I’m not proud of it…for years. I really just figured it was because I mix a lot of dough in it and thought it was normal that the big ball of dough would make it wobble.

I did notice the hinge pin sticking out on the left side but forgot that it didn’t look like that when I first bought the mixer. I wondered at one point whether it was a handle or an anchor for an attachment. Turns out, it kind of walked itself out, similar to how a washing machine will walk across a room when it’s off-balance.

Now that I’m looking at it again, clearly, I’m an idiot. That’s just not right.

In spite of its sorry physical condition, the thing kept working. I feel like an abusive parent. I was mixing pizza dough this weekend when finally, it called “TIMEOUT”! Poor thing was still trying to work but it’s head was coming off.

At that point, I figured out that the hingepin was not a handle. I tried to jiggle it in but couldn’t get it even though it looked like I had lined up the head with the stand and could see straight through to the other side.

I googled “Kitchenaid troubleshoot” and found a video about how to fix a wobbly head. I figured it was too late for mine. Nothing addressed a decapitated head so I watched that video, did what it said and it worked!

Here’s what I did:

Warning, this post contains graphic images that may not be appropriate for small children! Viewer discretion is advised.

After I scrubbed in….

1. I unplugged the mixer and laid it on its side. This is not easy to do when it’s practically in 2 pieces. I’m pretty sure they’re made of kryptonite….HEAVY!

2. I loosened the smallish screw that apparently holds the hingepin in place. As I suspected, it was in just far enough to prevent me from replacing the hingepin while the thing was upright.

3. The pin slid right through to the other side. Head successfully reattached!

4. Gave the same screw a few turns until tight. Done!

(You have to admit, the photos are kind of gynecological…not to mention the language!)

Do you have a Kitchenaid mixer? I’ve had mine for probably 8-10 years and love it. I use it a lot to make pizza dough and the dough for the french bread. My neighbor has been using hers for 40 years and she’s a person who bakes all the cookies for everyone’s weddings, showers, birthdays, funerals, communions. Not just a couple of dozen but a couple of hundred dozen. I’m not kidding. If you’re considering finally getting a stand mixer, don’t even think about getting a different brand.

Chances are you would never have let a wobbly head go as long as I did. If you’re mixer’s head wobbles, tightening that little screw should do the trick.

There are affiliate links in this post but my opinion is my own and nobody from Kitchenaid knows me or has asked me to say nice things about their mixers….or perform surgery on one. I am not a licensed practitioner.

Linking up here:

  The Shabby Nest

How to Sew Piping in 6 Easy Steps

If you have a project in mind that involves cushions or reupholstery with piping (aka cording or welting), I’ll finally show you how easy it is to do it yourself.

I have posted in the past about my adventures in recovering cushions and in completely making new box cushions from scratch. I won’t lie, it takes a lot of time to make your own cushions. I think it’s worth trying once, though, just for the satisfaction of accomplishing the project.

1. Find your piping or cord

I realize that this seems obvious but I wanted you to know that this part of your project or cushion can be recycled. I recycled the piping from my friend’s cushions when I redid hers last spring. Not only did it save her money, it was made of a sort of plastic material which was more suitable for outdoors. Also, I didn’t have to measure it. Yay!

remember these? I’m still proud of this project.

If you can’t recycle, you can buy your cord at JoAnn Fabric, Amazon or at other online suppliers. It’s not too expensive but if you plan, you can use a 40% or 50% off coupon. (Keep in mind that a coupon at JoAnn is only good toward one package, but they also sell it by the yard). I ordered some in bulk from fabric.com for my box cushion project in the mountains. If you’re doing this, make sure you know which thickness you want.

You can see 2 different thicknesses here. 

2. Measure your piping

If you’re not recycling, roughly measure how much cording you’ll need. Just take your cording and run it along your cushions and/or the outline of your upholstery project. You don’t really need to be exact in most cases. Longer is better than too short but there’s an easy fix for that.

3. Cut fabric strips for casing

Cut your fabric into strips between 2″ and 2 1/2″ wide. Again, you don’t really need to be exact. If you’re going to be sewing the piping into box cushions or pillows, just make sure you have enough of a flange or fabric overhanging away from your piping for the machine to hold onto.

If you’ll be using your piping on an upholstered chair, one option is to cut this as close to the sewn edge  (next to piping) as possible because you’ll be gluing it to cover your staples.

Otherwise, you’ll need the flange to staple the piping to your edge or piece of furniture (or sew into your cushion covers. The piping sticks out along the edge and the flange is covered by a finished fabric edge…but that’s another post.

4. Sewing strips together

Almost any amount of piping you’ll need will require very long strips of fabric. You can make the casing as long as you need it by sewing them together using this method:
a. Place strips right sides together at a 90 degree angle, pin and sew a line to form a triangle. See below.
See how this forms a triangle? Next, you’ll cut this triangle off.
Open up your strip…
then press the seam open.

5. Encase your piping in the fabric strip and pin

Be sure to leave some room on either end of the cording.

6. Sew

OK, so I used a photo twice….not like you’re paying by the photo!
The most important thing here is to use your machine’s zipper foot. It allows you to tuck the stitch right up against that cording. (I had no idea mine up there was so rusty. I don’t think it looks that gross in real life).
Just sew a straight stitch right along the cording, backstitch at the beginning and end if you want but since the piping will likely be sewn or glued to the final product, it’s no big deal if you forget to do this.
You are finished!
There are other great tutorials out there which is how I was inspired and learned to tackle this easy but initially intimidating task. It does add an element of tediousness to your project…..you have to take the time to make it, then you have the added pain of including it in your cushions or upholstery project. I think it’s worth it, though. It gives any project that tailored look.
If you’re like me and need to see a few examples before diving in….these other tutorials might help…
1. Ashley’s post at “make it and love it”. I agree. Though my blog would be called “make it and be totally ok with the result”
3. Design Sponge (what a hot looking blog, makes you want to make something!)
Editing to add this post to Elizabeth Foss’ weekly sewing/reading wrap-up: Go get inspired!
needle and thREAD
In keeping with the theme of Needle and Thread, I’ll share that I’ve just finished 2 books that are completely different but equally enjoyable to me.
The first was “First Service” by Andrea Jaeger:
At 14 years old, Jaeger was ranked #2 in the world on the women’s tennis tour behind Chrissy Evert. In spite of a non-religious upbringing, she clearly heard God’s voice and direction in her life from a very early age and followed that to fulfill God’s will for her. When her shoulder was injured early in her career, she took that as a clear sign that her life was supposed to take another direction. She chronicles her efforts to build a ranch in Colorado for children battling cancer. It’s an inspiring and easy read. I always enjoy stories about people who are confident and unapologetic about their faith. I believe she recently joined an order of nuns and is still involved in the foundation which runs the ranch and other programs to help suffering children around the world.
The second book I’m currently reading is one I mentioned in this post. It’s “Start” by Jon Acuff.
Acuff is a clear thinker and effective communicator. Start is inspiring, entertaining and full of motivating examples to help a person discern the inner voices and other obstacles that keep them from pursuing their dreams and fulfilling their life’s purpose. The book also has practical exercises to help you Start working on your dream. I’m not reading this as much for myself (though I do have some projects and ideas on the back-burner but my vocation for the moment is pretty clear) as for Mark and the kids. While Mark is working in a career in which he’s passionate, as he gets older, his chosen profession is beating him up. Now is a perfect time to begin to explore how else he might use his expertise in the event that he isn’t able to teach in the future.
*This post contains affiliate links.

Revisiting a Quick Outdoor Project

“Quick” is relative. In terms of hours, this project didn’t take long but let me confess, it actually took about 15 years to complete. Let me ‘splain. This homemade (not by me) workbench sat in our garage for about 5 years after we moved in. We did not use it as a workbench, rather, it was a catch-all for junk. The first time I ever cleaned out the garage, I decided to take it out to free up some space. I sort of crab walked this table one end at a time, by myself, to the side of my house, thinking I’d use it for a potting bench. The sucker is HEAVY and it was UGLY!. Picture legs made out of pressure treated posts, scrap wood made up the apron and lower shelf. Finally, the top is a piece of sheet metal that had splotches of paint on it. I seriously think the inept contractor who owned the house before us found the sheet metal first and decided to build a table around and under it. Here she is before…..without the sheet metal top.
Folks, this was not rocket science. It definitely was put together with scraps. This view shows the basic design. I think the end piece on the top at the far end of the photo was a scrap of tongue and groove flooring. Goes to show you, you can make useful furniture out of any wood.
So, it’s been a useful potting bench and beverage and serving table in our yard for about 6 or 7 years. Ugly, though. I always covered it with a tablecloth but the bottom still showed. Let’s just say, it was completely utilitarian. I have admitted before that I have NO imagination or vision. But the creative, DIY blogs have made me look at everything with different-colored glasses. So, last fall, I decided I should paint the darn thing. But I only got around to primering it. This spring, the the girls had a neighbor friend over and were bored and I had some leftover light green sample paint, so I let them have at it.
The bottom was painted and has been sitting for a month. What to do about the metal top? The girls wanted to do a mural. Good idea considering they and the neighbor girl are extremely artistic. Then I decided to paint the top black and decide later what kind of design on top-even if they designed it. Then I discovered some left over chalkboard paint in the basement-SHAZAM! It’s perfect. The kids have been having a field day with the sidewalk chalk on it but when I have a party, I can label what I’m putting on it or just write a message. I like it so much better. What I love about this DIY stuff is that even a small change to something makes a big difference in how I feel about any space.
One person who came across this post commented that she wanted to make her own. It looks very simple, doesn’t it? I would not recommend the steel top as it makes it even heavier than it already is. By now, this table needs freshened up a bit. I’ll get to that.
Here’s the “after” picture of the table.
Last spring, we had a new stone patio put in….I have before and after photos of that (I think). Promise, I’ll post about that project, soon.Linking to these parties:

Don’t miss Gina’s giveaway!

My Finished Project

I finished the photo book of our New Year’s Trip to the Cabin. It’s titled “A New Year’s Trip to the Cabin”. Genius, I know. I edited the original book for publishing on this blog to protect privacy.

Click here to view this photo book larger

Start your own Shutterfly Photo Book today.

I am finding that creating photo books is the easiest and cheapest way to preserve memories. I have made pages in Picasa and uploaded them to print at Persnickety Prints, which is user friendly but I just like the final product of a book better. I especially like the 8 X 8 size.

I started a 12 X 12 scrapbook for the mountains and created pages at persnickety prints. I probably will finish it (at least for the year that I started it). From now on, I’m waiting for specials and creating 8 X 8 or 8 1/2 X 11 books.

Groupon always has deals for different sites.

Momentum on Monday was a big help in finishing this project-also the deadline for the offer. I think without my mini commitment on Monday, though, I might have put it off or forgotten about it altogether.

Summer Project

needle and thREAD

The kids are finished with school and they are at an age now that I’m no longer their cruise director. Don’t get me wrong, I’d love to take them different places during the days but their range of age makes them variably interested in things so I just leave their entertainment up to them.

That leaves me extra time to focus on a few house projects. I started recovering my porch cushions in March but was undecided about the fabric. I interrupted that project to recover my friends’ porch cushions.( I mentioned that here). Although my color scheme was different, I poached my friend’s pattern for the settee and stuck with stripes in the same color pallete for the chairs. It looks way better in the deep red that she chose. To be honest, my combo looks kind of blah but it’s way better than my worn out, cat-pee, old cushions. Since I’m not LOVING the combo, I decided to save time by not bothering with piping on the chair cushions. The cushions are good enough. It does brighten up the porch a little and I’ll finish accessorizing and do something about the drab indoor/outdoor rug situation later in the summer.

Here’s what my chairs looked like before….

From a distance, this set actually looks kind of neat and simple. Then you get up close and uuhhh (shoulder shudder)… these cushions were GROSS! Like I said, at the end of last season, I’m pretty sure a cat or some other neighborhood nocturnal creature or (even grosser) some nocturnal neighborhood teenager….peed on the couch. Even aside from that nastiness, they were just done. Stained, misshapen and tired.
Here they are after….

Pretty nice-huh? I was a kind of psycho about lining up the stripes on the tops and sides. It didn’t waste too much fabric and I don’t think I’d be as particular with a pattern.

I recycled the guts and the zippers. Fair warning, I still probably spent about $10-$20 on each cushion. I found that the densified foam inside was washable. I also was surprised to find that the foam was 2 inches with 2 layers of densified foam on either side. These cushions are 4-5 inches thick and very comfortable. If I ever make cushions from scratch again, I’d use this method for the insides.

Here’s a photo to show you the insides… I think the densified foam makes the cushions dry faster if they get wet. I was surprised that the yellow foam was in good condition and didn’t smell like mildew or cat pee in spite of having gotten wet or damp plenty of times over the years that I’ve had the set.

I purchased this porch furniture at Target about 6 years ago after my wicker furniture fell apart. It’s held up very well and it’s sturdy and comfortable. We have brought it inside for winters and that’s probably helped.

Finally, here’s a photo of the cushions I did for the settee. Can you see why I didn’t want all stripes? I’m still convinced of that but the pattern in this color pallette isn’t doing much for me. Although the color scheme on the selvedge of each pattern (floral and stripes) matched, I don’t think the cushions really coordinate-BOO! They’re acceptable, though. I’m not really a perfectionist in case you couldn’t tell that from my other posts.
And a shot with the chair to show you what I mean about the fabrics not really coordinating. Oh well.

I did my friend’s cushions because I wanted to practice. I found out that while I’m getting better at this skill, I don’t have a passion for it. I would not want to do it as a business. It is tedious and time consuming. I’d be happy to do a box cushion here and there for a friend but 6 is A LOT OF TIME! I was happy to do it for a lot of reasons. Just saying, this will not be my new venture.

So that’s what I’ve been up to around the house….now for what I’ve been reading…..

I just finished Stephanie Nielson’s memoir, “Heaven is Here”and really loved it. That seems like a weird thing to say about a story which chronicles a young mother’s recovery from a tragic and near-death plane crash but I really loved it. It was well-written, so relatable, sometimes painfully and brutally honest but completely endearing and inspiring. I was pleasantly surprised that it wasn’t just a rewrite of blog posts that I’d already read (though I wouldn’t have blamed her for doing that). My friend, Alicia (Hi Alicia!) always passes along good books and this was no exception.

I was surprised that more than her struggles as a mother, I was most touched by the tenderness and attention her siblings provided to make her well. I guess I wasn’t surprised that her parents or husband or even her sisters did everything they could to help, but her brothers were so sweet and nurturing and I truly could see each of my brothers taking care of me that way if I ever faced a crisis. I guess I know it because they were so kind, gentle and attentive with my dad when he lost his leg four years ago and before he died this spring. (I know I haven’t written about that-a little too raw still). I’m so proud of all of them and feel blessed that they have my back.

Be sure to check out Elizabeth Foss’ blog for more inspiration on good reads and fun projects.

That’s what I’ve been up to. I love summer!